
Android SDK quick start guide
Overview
Ansa’s mobile SDKs make it incredibly simple to interface with Ansa’s APIs and provide developers a customizable, out of the box UI.
We provide two SDKs:
- Ansa Core – a headless core SDK that lets you fully manage your own UI
- Ansa UI – immediately usable UI SDK with pre-built components, which uses Ansa Core under the hood.
This guide will get you started with integrating the Ansa SDK into your Android application.
Step 1: Setup your environment
The Ansa Android SDK is fully documented, and compatible with apps supporting Android 8.0 (API 26) and above.
To install the SDK, follow these steps:
Add the following dependencies in your app/module build.gradle file:
dependencies {
    // Replace with the latest version
    implementation 'com.getansa:sdk-core:<version>'
    implementation 'com.getansa:sdk-ui:<version>'
}
Make sure your repositories block includes mavenCentral() in your root build.gradle.
Step 2: Setup a Customer
First, you'll need certain API keys and identifiers, which are accessible/can be created in the Ansa portal. In total, you'll need:
- Merchant ID – the unique identifier for your merchant account
- Merchant Publishable Key – a publishable API key that is safe to include in client-side code. Used to initialize the client-side SDKs and is authorized to invoke select API endpoints
- Client Secret Key – a short lived key scoped to a specific Customer meant to be used by client-side code
Creating a Customer
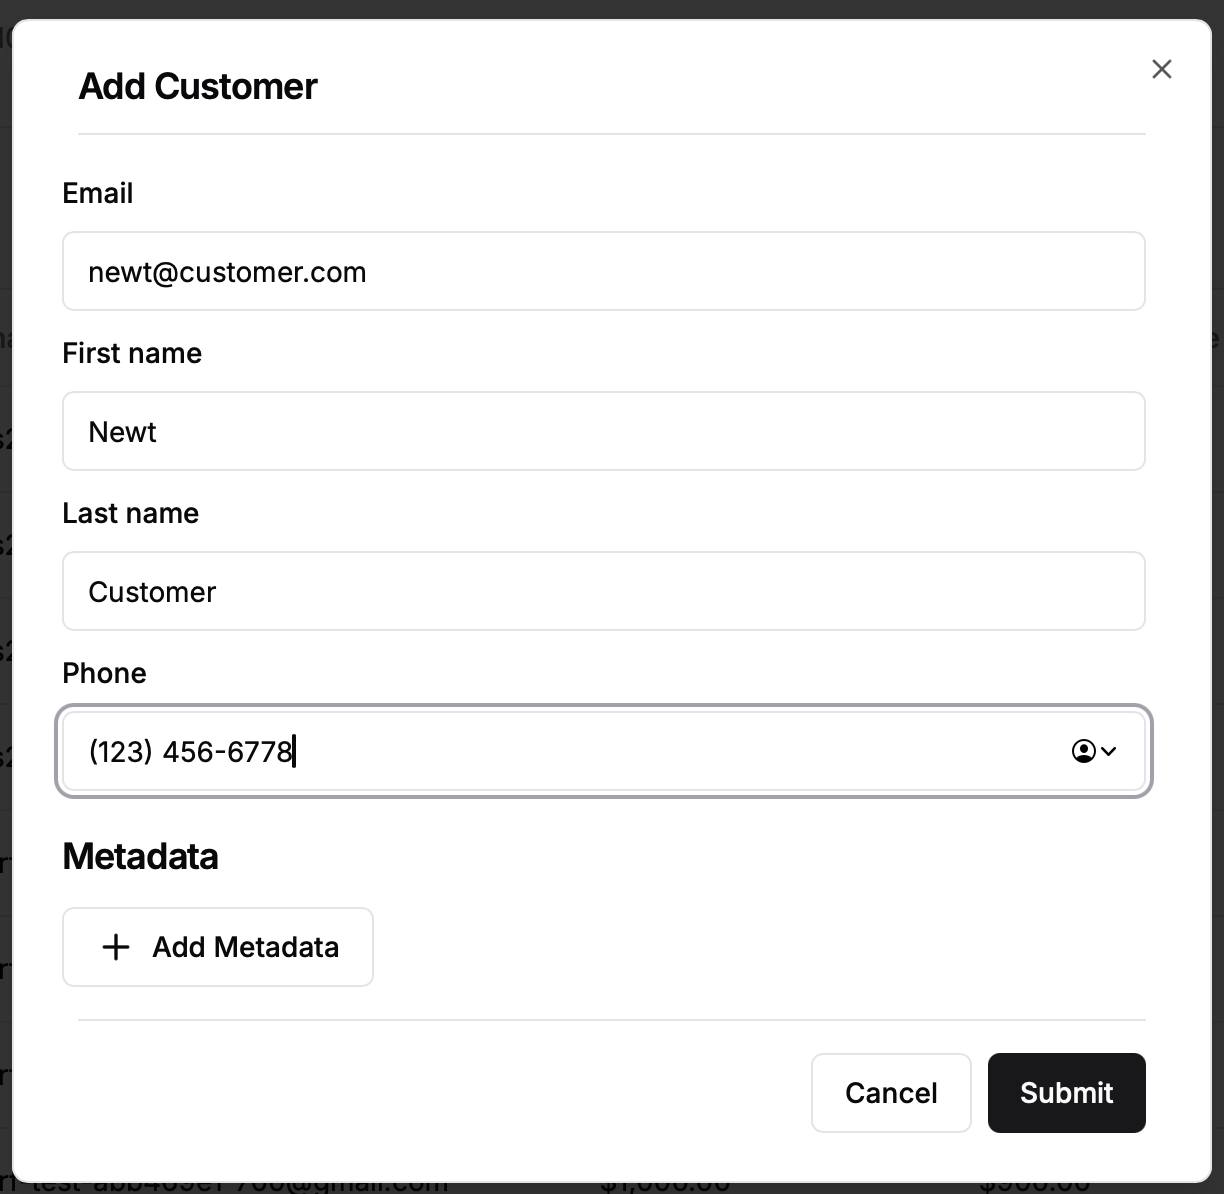
To quickly get started, let's create a Customer using the Ansa Portal. Click Add customer and fill in customer details.
Production noteIn production, you'll want to use the API (such as from your backend) to create a customer and link it to your internal definition, as opposed to using the portal to create customers.

Once the customer is created, you'll see the new customer in the list. Click it to access the overview.

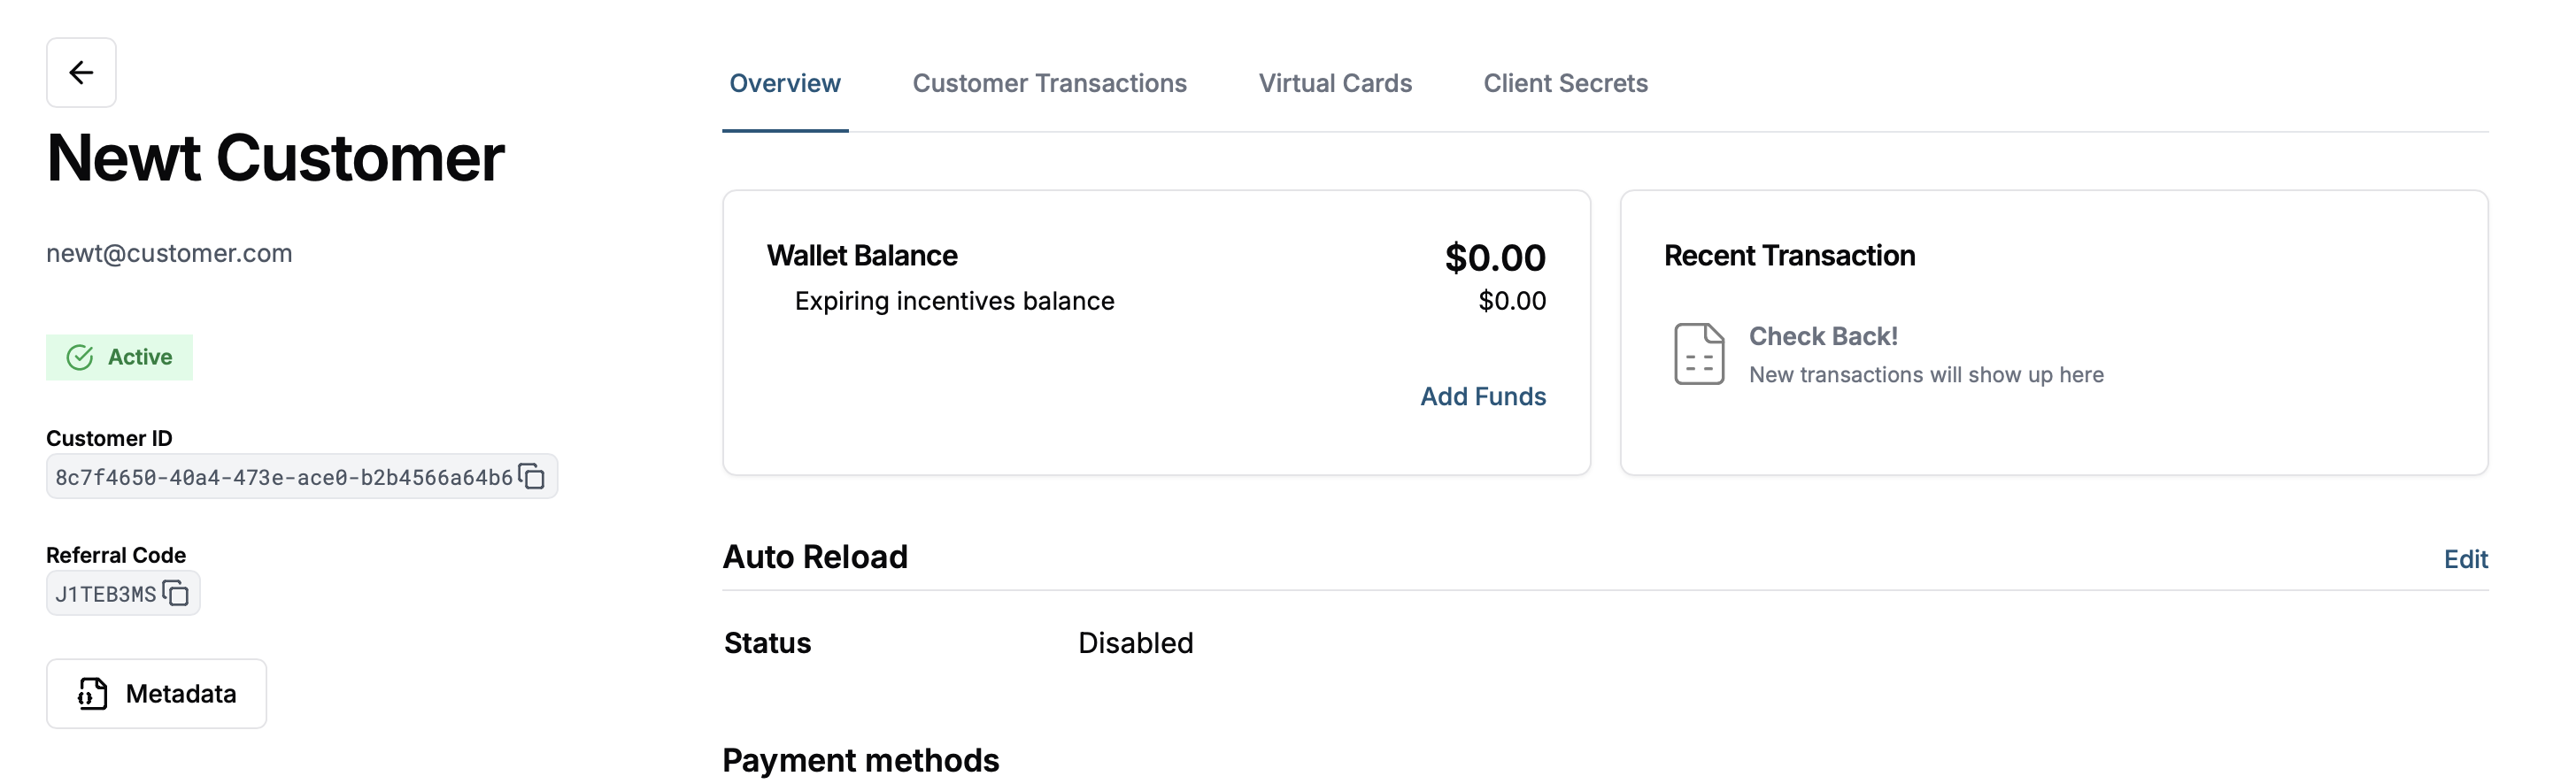
From here you'll need to retrieve the Customer ID and create a Client Secret Key.
The Customer ID is available along the left hand side, under the name, email and phone number (omitted from the images).
To create a Client Secret Key tap Client Secrets and then Generate Key.
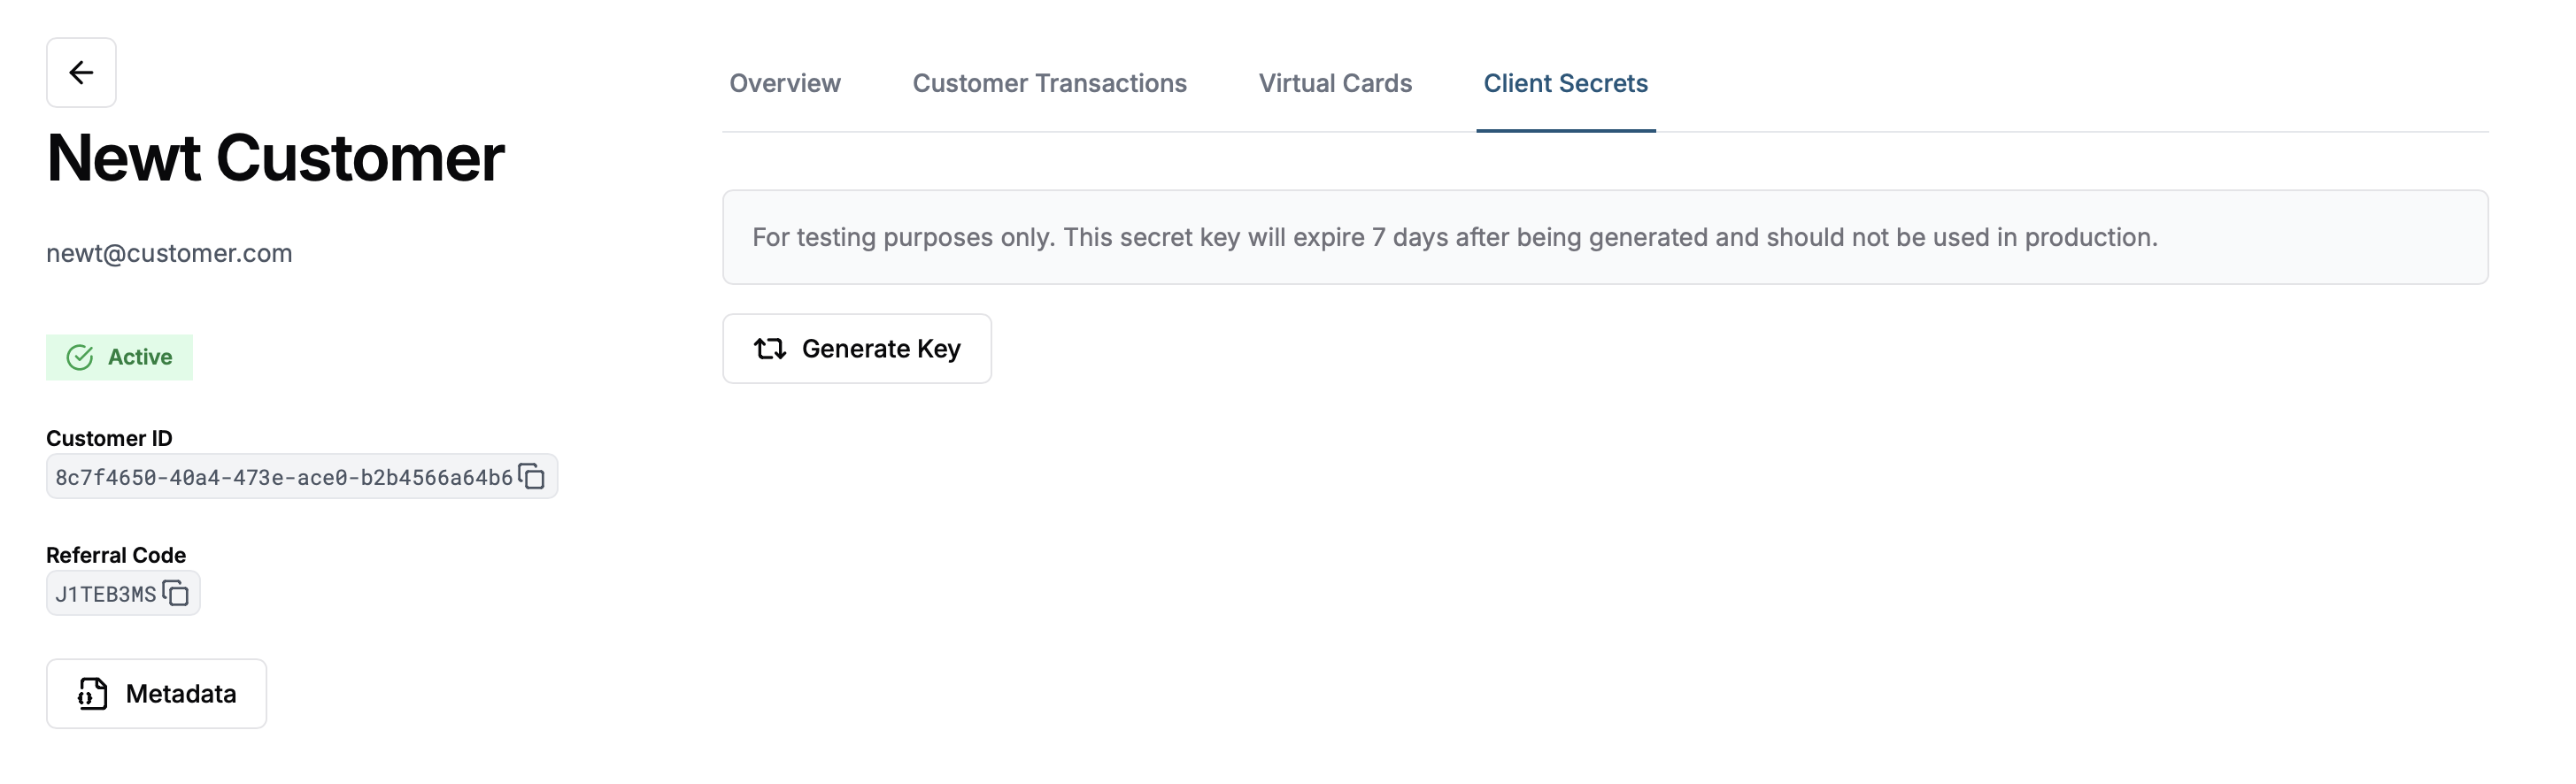
NOTE: Client Secret Keys generated here are for testing only and expire after 7 days. They are not meant to be hardcoded for production use.
In production, you'll want to use payment sessions to regenerate client secret keys via the API. See here for more details on payment sessions.

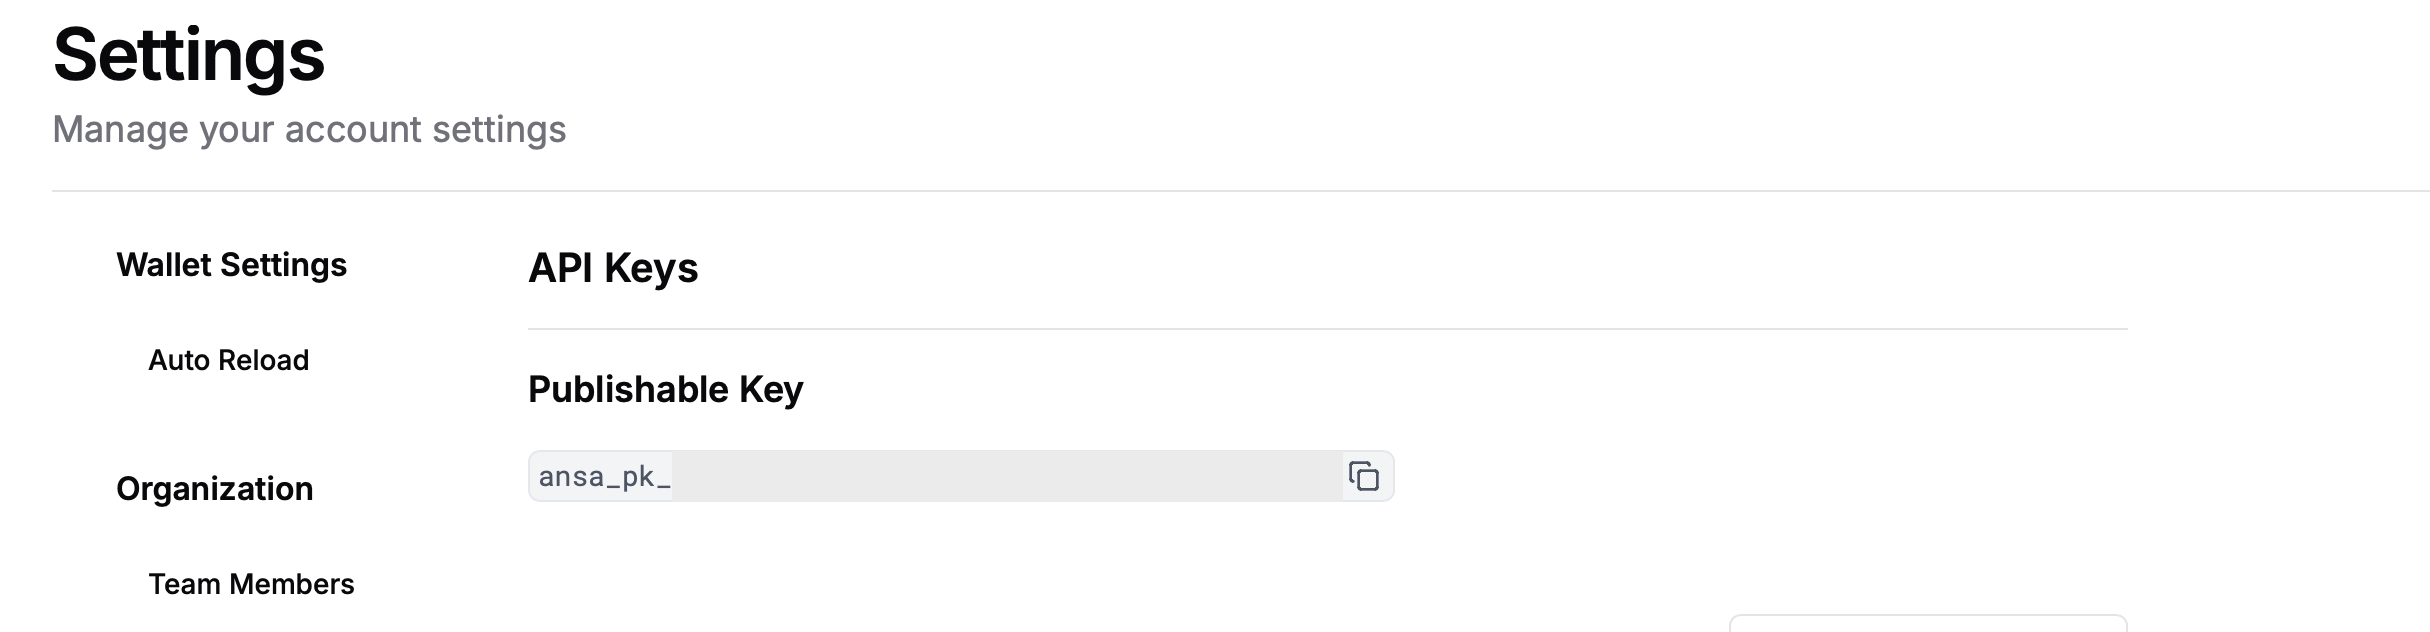
Merchant Publishable Key
To obtain your merchant publishable key, click the Settings icon in the top right and click "API Keys" under Developer.
You now have everything you need to test the SDK!
Step 3: Initialize AnsaClient
Everything data related for your customers and merchant information is available through the AnsaClient. Initializing the client can be as simple as 4 lines of code.
val ansaClient: AnsaClient = AnsaClient.init(
    publishableKey = "merchant publishable key from portal API keys",
    clientSecretProvider = ClientSecretProviderImpl()
)
At the bare minimum, an AnsaClient requires the merchant publishable key and a ClientSecretProvider instance. The ClientSecretProvider interface allows our AnsaClient to request a secret key from your Backend for a given Ansa Customer ID. However, for this demo we will utilize the testing client secret key we generated earlier.
public class ClientSecretProviderImpl : ClientSecretProvider {
  override suspend fun provideClientSecret(ansaCustomerId: String): String? {
    // Hit client their backend, which calls initialize session w/ merchant secret
    // returns PaymentSession json payload
    // client needs to parse it and pass it to us

    return getClientSecretFromBackend()
  }

  private suspend fun getClientSecretFromBackend(): String? {
    return "secret-key-from-portal"
  }
}
Step 4: Receive API results
Once we have an initialized AnsaClient, we can query any data we need through the accessible managers - CustomerManager and MerchantManager - which are named accordingly.
viewModelScope.launch {
    val customerResult: ApiResult<Customer> = ansaClient.customer.get(customerId)
    val paymentMethodsResult: ApiResult<List<PaymentMethod>> = ansaClient.customer.getPaymentMethods(customerId)
    val merchantResult: ApiResult<Merchant> = ansaClient.merchant.get(merchantId)
}
All manager methods return an ApiResult, which is similar to Kotlin's Result, which means you get familiar extensions off of the result..
viewModelScope.launch {
    val customer: Customer? = ansaClient.customer.get(customerId).getOrNull()
    ansaClient.customer.get(customerId)
        .map { customer ->
            // do something with customer
        }
        .onSuccess { customer ->
            // use result
        }
        .onError { error: Throwable ->
            error.printStackStrace()
        }
}
Step 5: Trying the UI
The Ansa UI SDK provides a complete wallet UI component via the AnsaManagedBalanceScreen that can be dropped into your app.
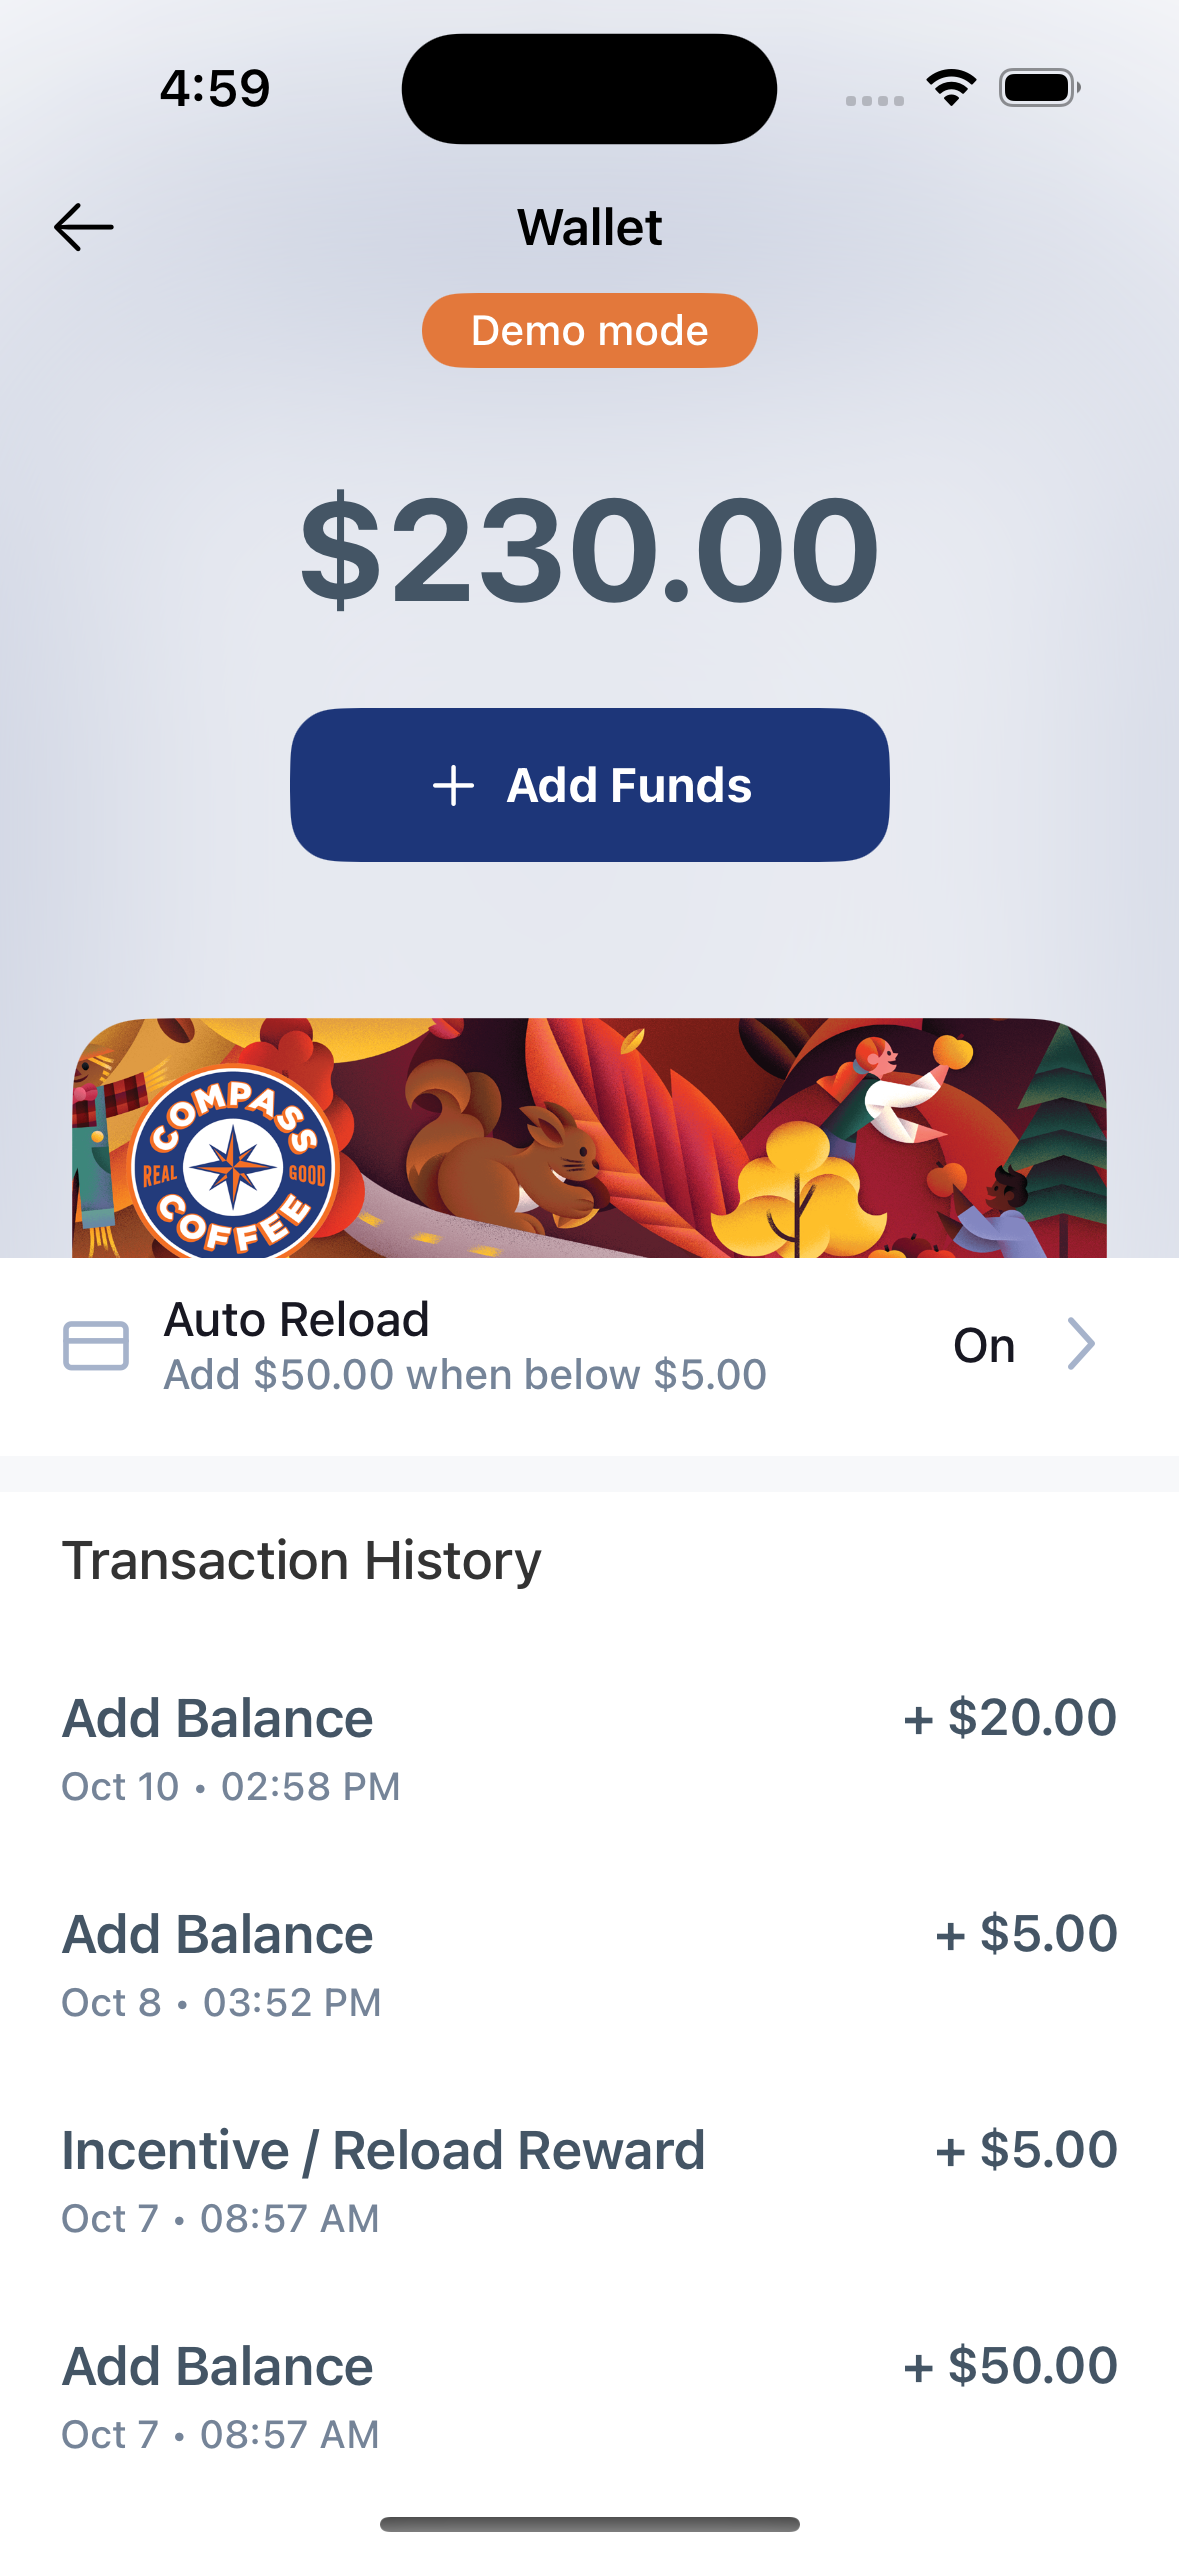
You can instantiate the view using the following:
 class MainActivity : ComponentActivity() {
    override fun onCreate(savedInstanceState: Bundle?) {
        super.onCreate(savedInstanceState)
        enableEdgeToEdge()
        setContent {
            AnsaTheme {
                AnsaWalletScreen(
                    ansaClient = ansaClient,
                    customerId = { customerId },
                    merchantId = { merchantId },
                  	onNavigateBack = {
                        // Handle back click and show back button.
                    }
                )
            }
        }
    }
}
Advanced Usage
Logging
Ansa supports allowing you to hook up any logging internally in AnsaClient to your preferred logging framework (swift-log, SwiftyBeaver, etc.) via a logging plugin during initialize().
private val ansaClient: AnsaClient =
    AnsaClient.init(
        logging = Logging(
            level = LogLevel.ERROR,
            log = { message: String -> Timber.e(message) }
        ),
        publishableKey = "merchant publishable key from portal API keys",
        clientSecretProvider = ClientSecretProviderImpl()
    )
For more details, you can check out the Kotlin API reference here. If you have any other specific questions or need further guidance, please reach out to your implementation manager!
Updated 8 months ago