
React Native SDK quick start guide
Overview
Ansa’s React Native SDK makes it incredibly simple to interface with Ansa’s APIs and provide developers an out of the box UI.
There are two components to the React Native SDK:
- Ansa Core – a headless core SDK that lets you fully manage your own UI
- Ansa UI – immediately usable UI SDK with pre-built components, which uses Ansa Core under the hood.
This guide will get you started with integrating the Ansa SDK into your React Native application.
Step 1: Setup your environment
The React Native SDK is compatible with apps supporting iOS 16 or above and Android 8.0 (API 26) and above.
Install the SDK using npm or Yarn:
npm install ansa-react-native
or
yarn add ansa-react-native
Note: For details on the latest SDK release and past versions, see the NPM package page.
Step 2: Setup a customer
First, you'll need to obtain API keys and identifiers from the Merchant Portal. In total, you'll need:
- Merchant ID – the unique identifier for your merchant account
- Merchant publishable key – a publishable API key that is safe to include in client-side code. Used to initialize the client-side SDKs and is authorized to invoke select API endpoints
- Client secret key – a short-lived key scoped to a specific customer meant to be used by client-side code
Creating a customer
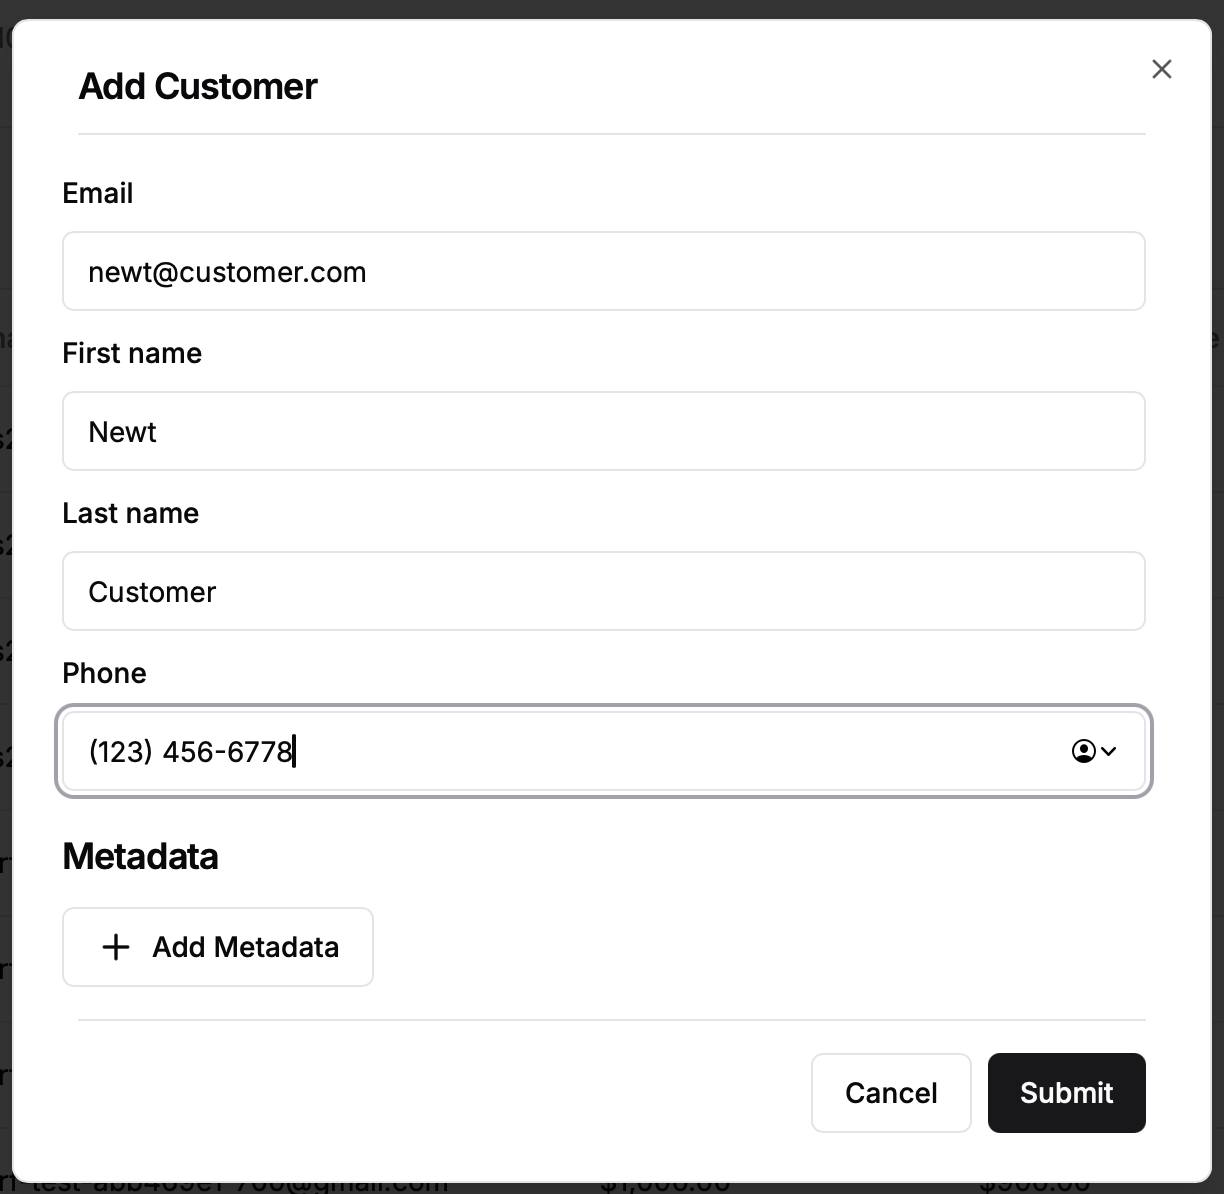
Start by creating a customer in the Customers section of the Merchant Portal. Click the "Add customer" button and fill in the customer’s details.
Production noteIn production you'll use the create customer API rather than using the Merchant Portal to create customers.

Once the customer is created, you'll see the new customer in the list. Click it to access the overview.

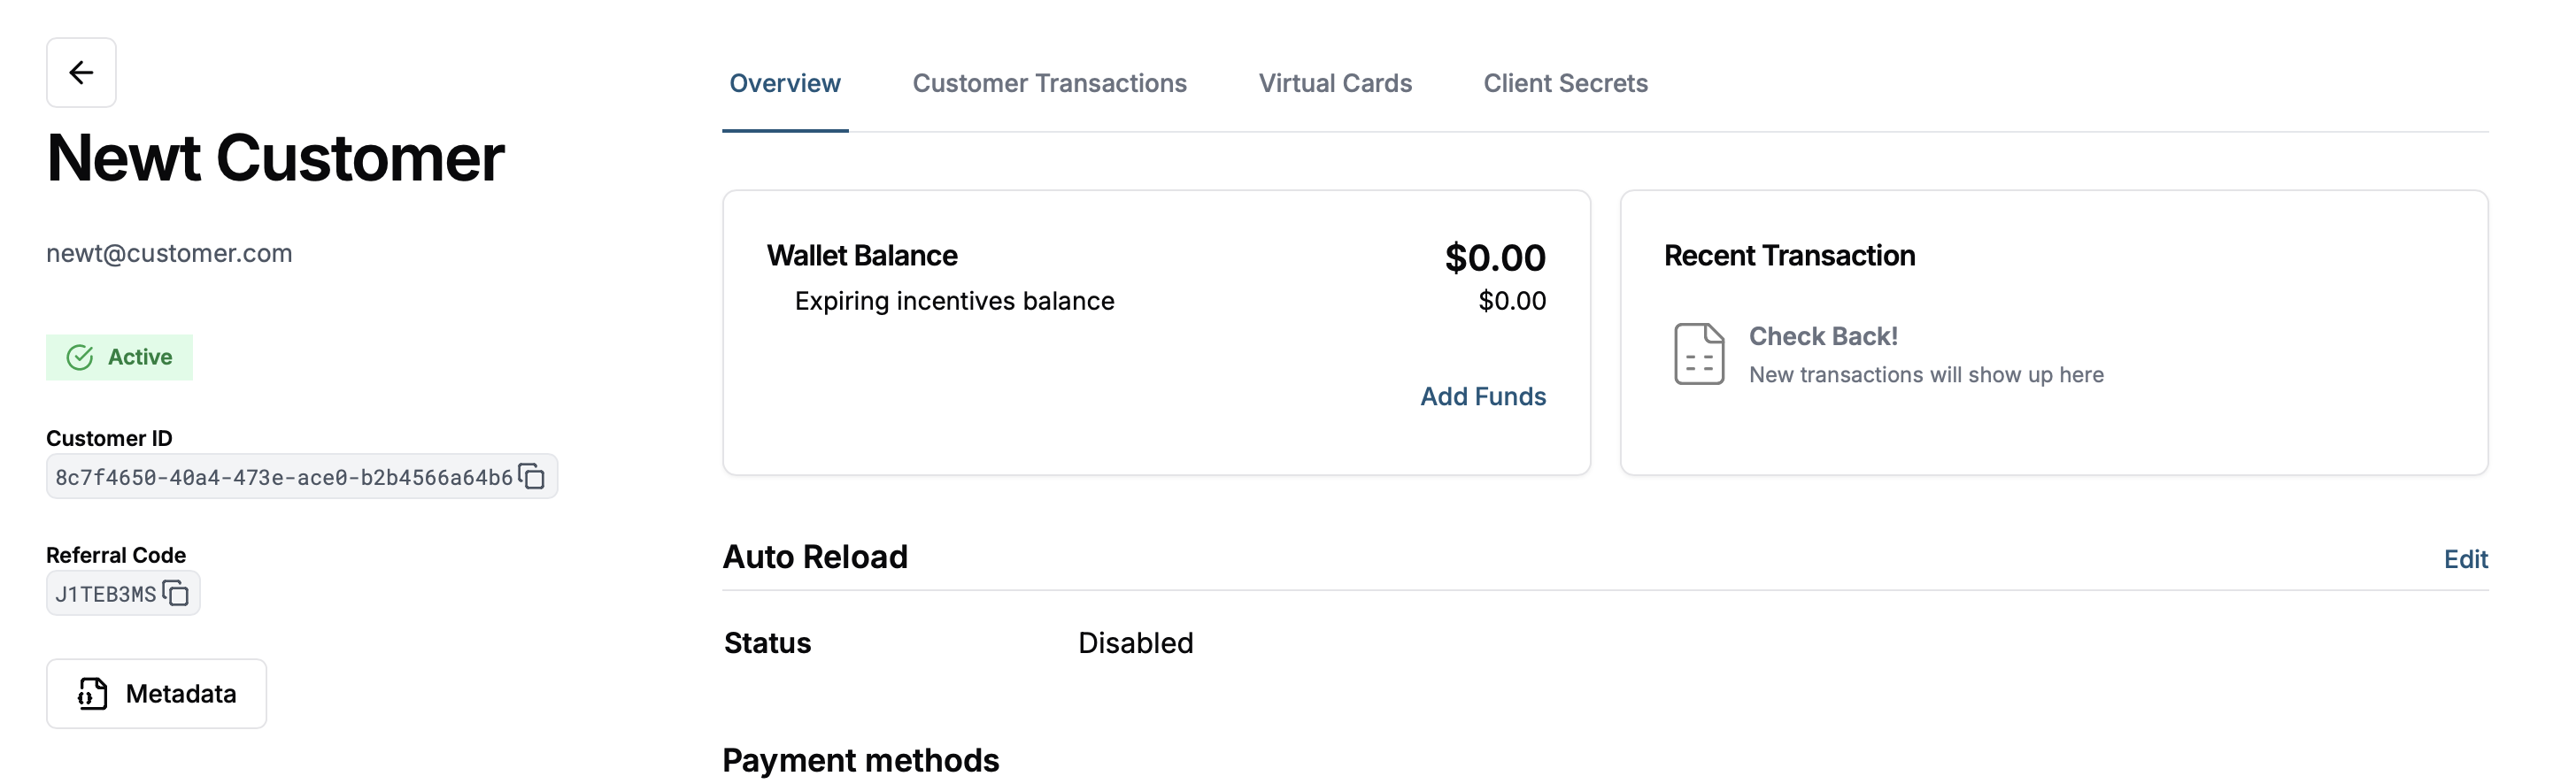
From here you'll need to retrieve the Customer ID and create a Client Secret Key.
The Customer ID appears on the left-hand side of the page under the customer’s name and email address.
To create a Client Secret Key navigate to the Client Secrets section of the customer page and then click the "Generate Key" button.
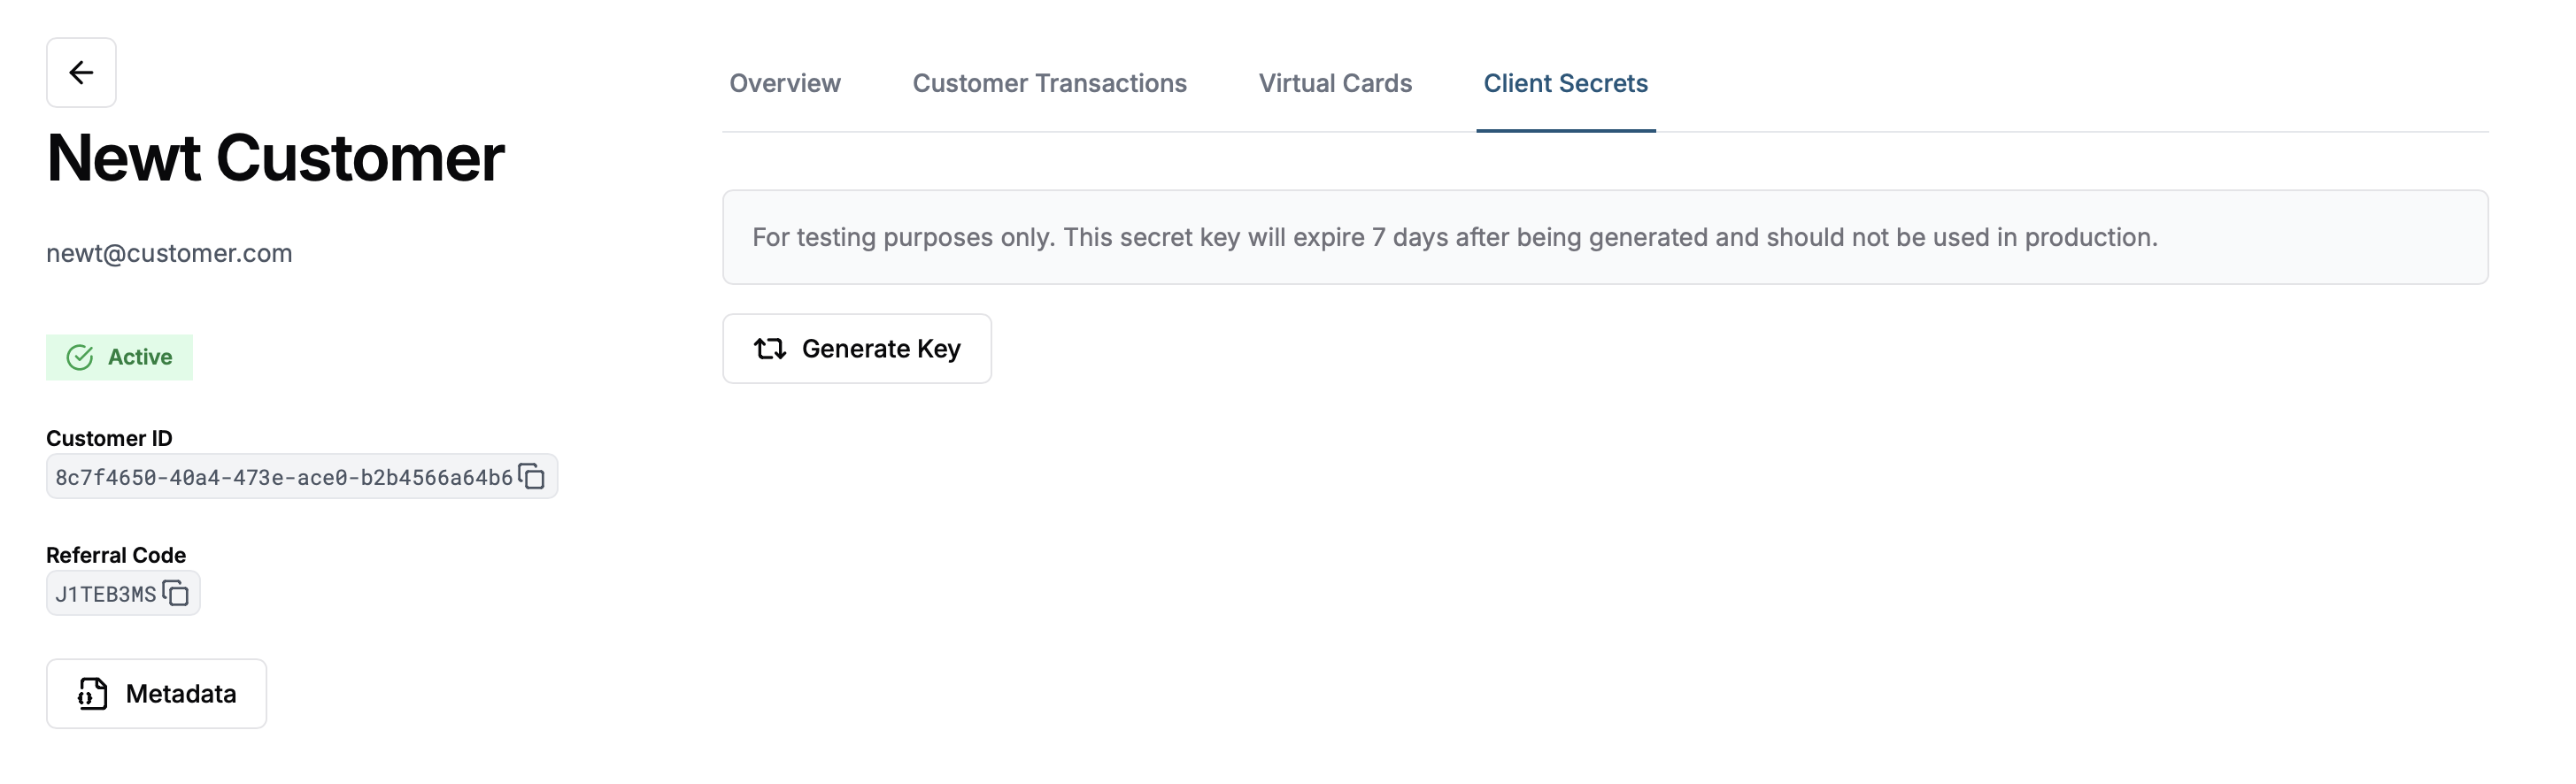

Production noteClient Secret Keys generated from the Merchant Portal are for testing only and expire after 7 days. They should not be used in production.
Please refer to the Payment session documentation for more details on using payment sessions to generate client secret keys in production.
Merchant publishable key
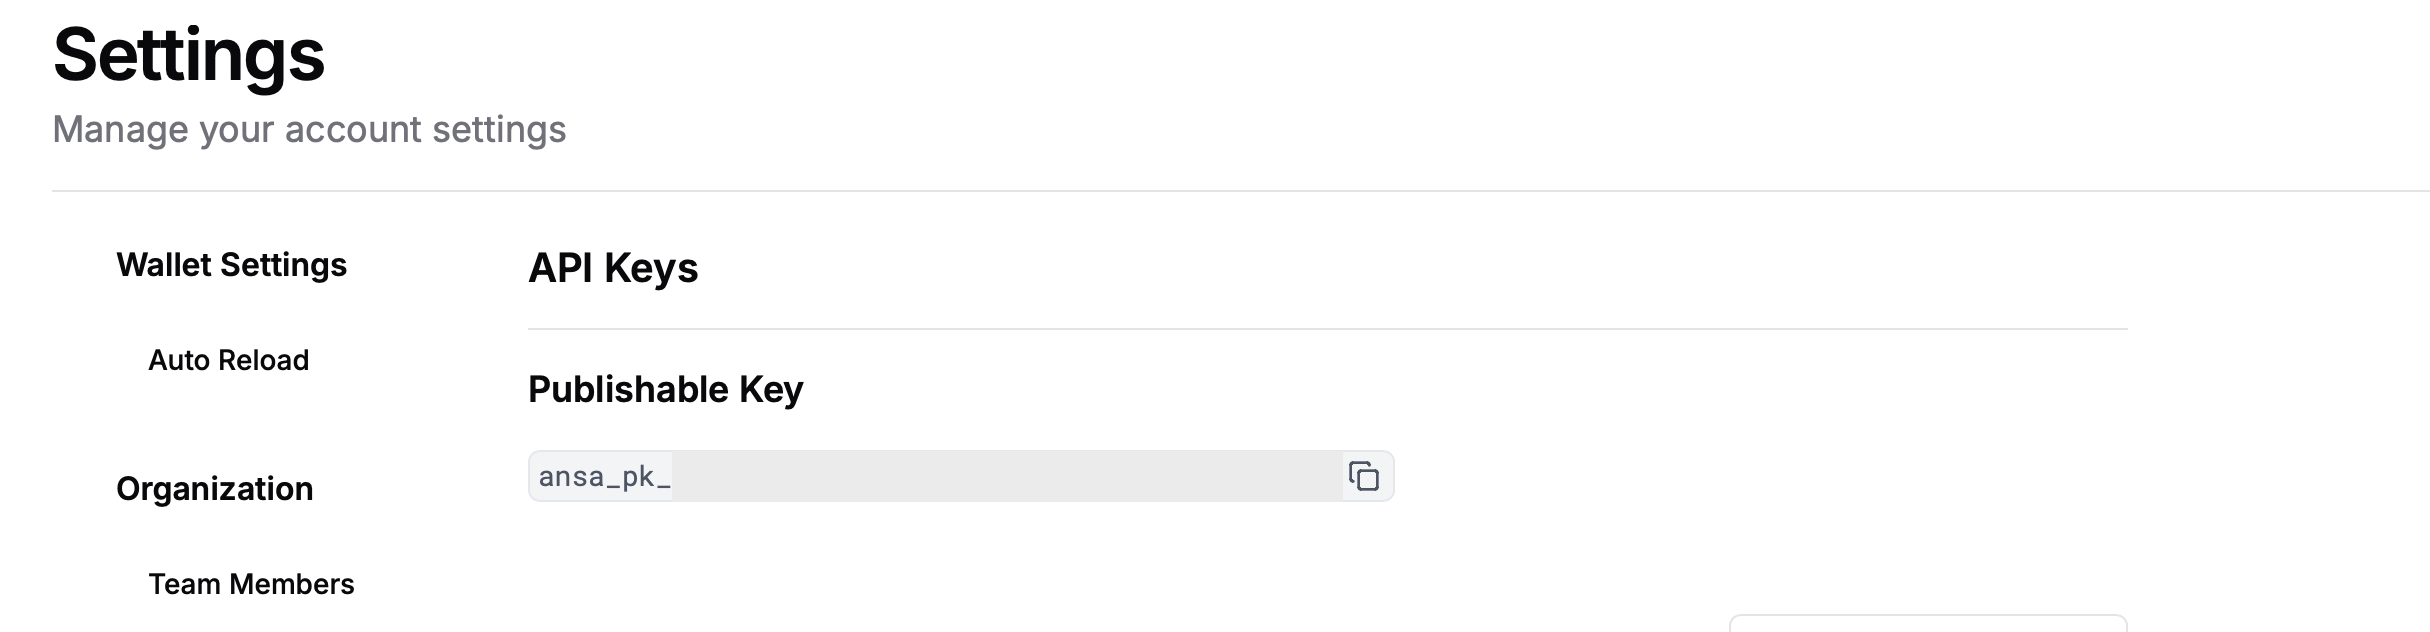
To obtain your merchant publishable key navigate to the API Keys section of the Merchant Portal settings page.
You now have everything you need to test the SDK!
Step 3: Initialize Ansa
Initialize the Ansa SDK in your React Native app by wrapping your app with the AnsaProvider component:.
import React from 'react';
import { AnsaProvider } from 'ansa-react-native-sdk';

export default function App() {
  return (
    <AnsaProvider
      apiKey="your-merchant-publishable-key"
      clientSecretProvider={clientSecretProvider}
    >
      {/* Your app components */}
    </AnsaProvider>
  );
}
Implement the clientSecretProvider function to supply the Client Secret Key. The clientSecretProvider allows us to request a secret key from your backend for a given Ansa customer ID. However, for this demo we will utilize the testing client secret key we generated earlier.
const clientSecretProvider = async (ansaCustomerId) => {
  // Fetch the client secret from your backend
  // Replace with your logic
  return 'your-client-secret-key';
};
Step 4: Receive API results
Once we have initialized the Ansa SDK, we can query any data we need. For example, you can fetch customer or merchant information as demonstrated below:
import {
  getCustomer,
  getMerchant,
} from 'ansa-react-native';

// Fetch a customer with specified customerId
const fetchAnsaCustomer = async () => {
  try {
    const customer = await getCustomer(customerId);
    console.log(`Customer data: ${JSON.stringify(customer)}`);
  } catch (error) {
    console.error(`Fetch Customer failed: ${error}`);
  }
};

// Fetch merchant information with specified merchantId
const fetchAnsaMerchant = async () => {
  try {
    const merchant = await getMerchant(merchantId);
    console.log(`Merchant data: ${JSON.stringify(merchant)}`);
  } catch (error) {
    console.error(`Fetch Merchant failed: ${error}`);
  }
};
Step 5: Displaying Ansa UI
The Ansa SDK provides a complete wallet UI component via the ManagedAnsaBalanceScreen that can be dropped into your app.
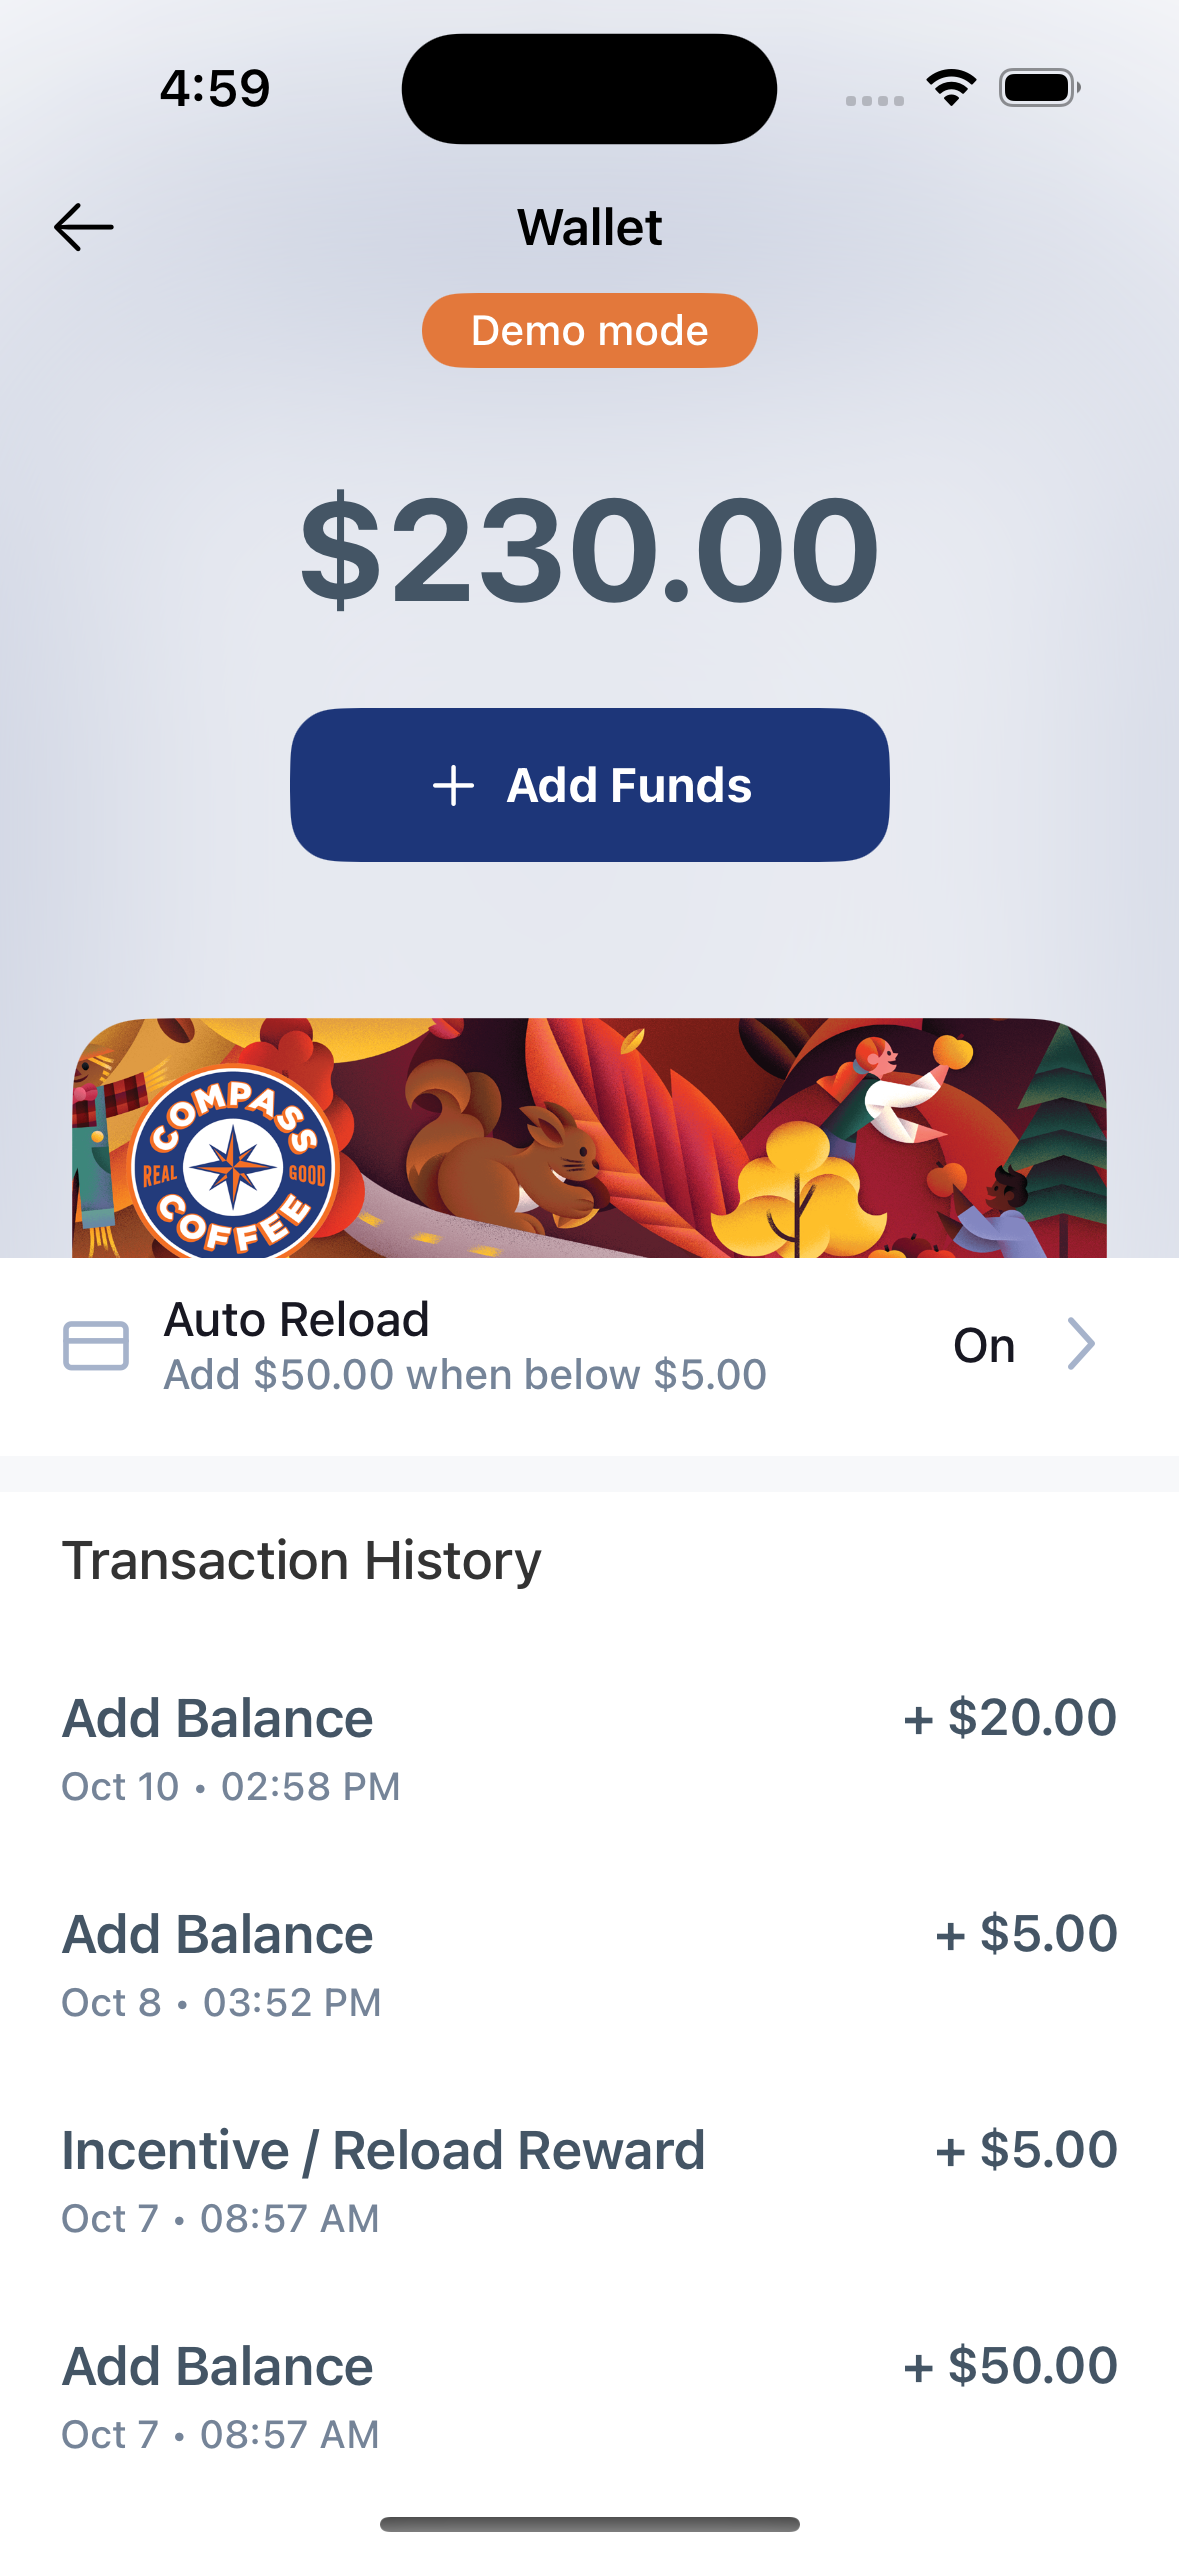
You can instantiate the view like so:
import { ManagedAnsaBalanceScreen } from 'ansa-react-native';

function YourComponent() {
  return (
    <ManagedAnsaBalanceScreen
      customerId="your-customer-id"
      merchantId="your-merchant-id"
    />
  );
}
Advanced usage
Logging
Ansa allows you to hook up your preferred logging framework via a plugin during initialization. You can configure both the log level and a custom logging function like so:
import { AnsaProvider, LogLevel } from 'ansa-react-native';

export default function App() {
  const handleLog = (message) => {
    // Hook into your preferred logging framework
    console.log('[Ansa React Native SDK]', message);
  };

  return (
    <AnsaProvider
      apiKey="your-merchant-publishable-key"
      clientSecretProvider={clientSecretProvider}
      logLevel={LogLevel.Verbose}
      logger={handleLog}
    >
      {/* Your app components */}
    </AnsaProvider>
  );
}
Expo
The Ansa React Native SDK is compatible with Expo. To use the SDK with Expo, you need to install the Ansa module and then rebuild your project using Expo. For Android, you may need to manually set the minimum SDK version in app.json.
"plugins": [
  [
    "expo-build-properties",
    {
      "android": {
        "minSdkVersion": 26,
        "compileSdkVersion": 34,
        "targetSdkVersion": 34,
      }
    }
  ]
],
Updated 8 months ago